You can easily tell if a video was shot on a GoPro by the extreme fisheye effect that is present in the video. The GoPro has an extremely wide-angle lens so it can capture a large field of view this is one of its selling points. Sometimes we don’t mind the fisheye look, in fact, it can add to the scene, however, there are times that the fisheye effect is a hindrance and we want to remove it. There are many ways to go about removing the fisheye from your GoPro videos Most of the big video editing suites come with lens correction tools. These big name editors are great however they can be very expensive and the learning curve is quite steep. This sometimes not the best solution for a casual GoPro user.
There is a simple solution provided from GoPro in its GoPro Studio editor and the best part is, its FREE! You can download GoPro studio from the GoPro website. In this tutorial, I will show you how to quickly and easily remove the fisheye effect in your GoPro videos with a few simple steps.
How To Remove The Fisheye Effect in Your GoPro Videos
Step 1 – Launch GoPro Studio: To start off we will need to launch our GoPro Studio desktop app. When editing any video in GoPro studio we need to convert the GoPro video file first into a format that can be easily edited. It is in this step that we will be removing and fixing the fisheye effect.
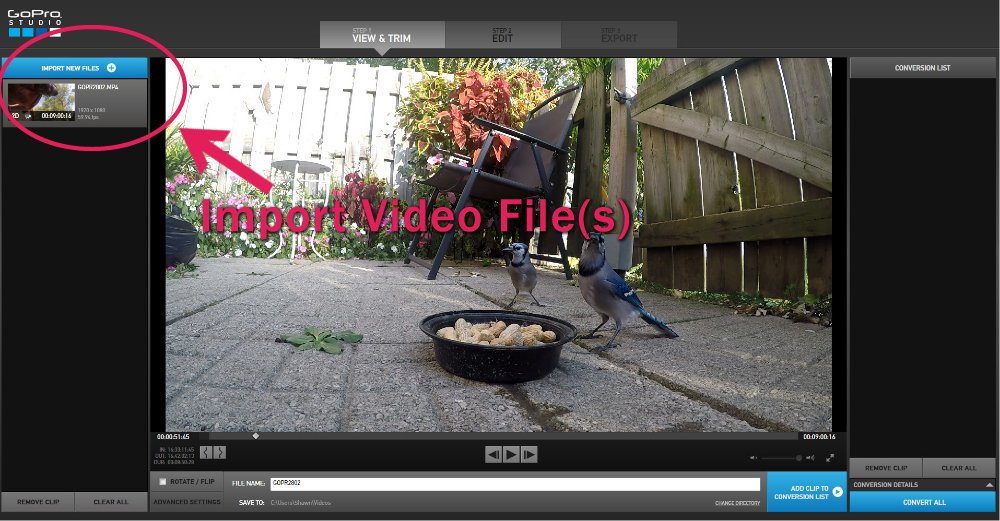
Step 2 – Load Your Media: On the left-hand side of the page click on the “Import New Files” button. Browse to the location of the GoPro video file that you would like to do some lens correcting on.
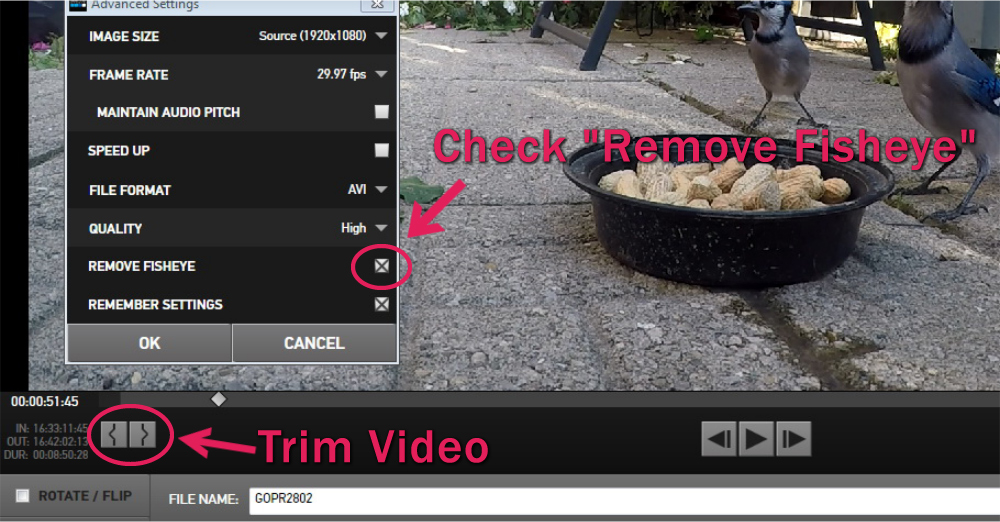
Step 3 – Set Your Conversion Parameters: We are going to set our conversion parameters by clicking on the “Advanced Settings” button at the bottom left-hand side. Place a tick in the box labeled “Remove Fisheye”. Close the advanced settings dialog box when done. At this point, you can trim your video by using the cropping markers. Trim the beginning and end of the clip to get rid of unwanted sections. This will dramatically decrease the conversion time, especially if they are long clips. Processed to step 4 when complete.
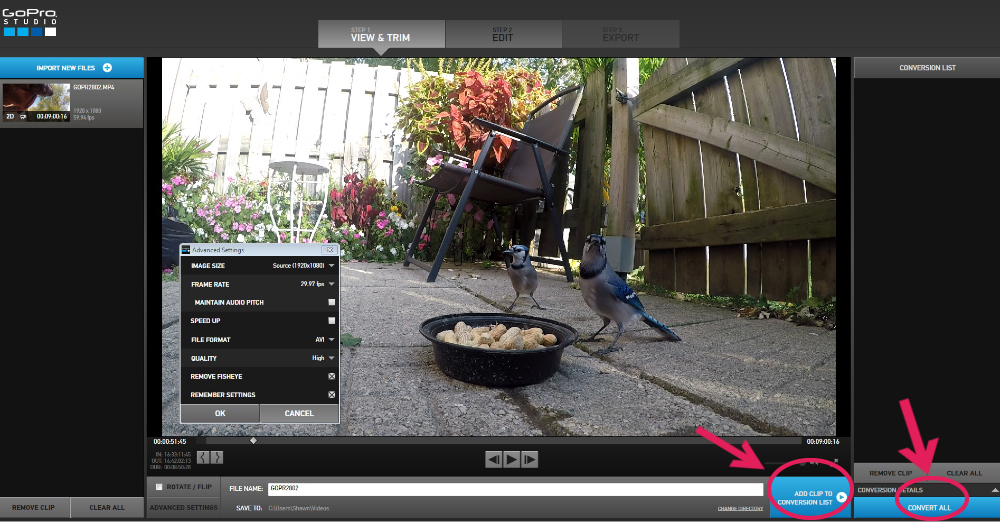
Step 4 – Convert Your Clip: At the bottom right of the screen, we can now add our clip to the conversion list. Once done click on the “Convert All” button. Your clip will now be converted and the fisheye effect will be removed. The newly converted video file will automatically be saved to your default export location on your computer, for mine, it is the “Videos” folder. You could just close GoPro Studio now as your new video with the fisheye effect removed has been saved to your computer. You can, however, go a step further to enhance your new clip. If you wish to enhance your video further proceed to step 5.
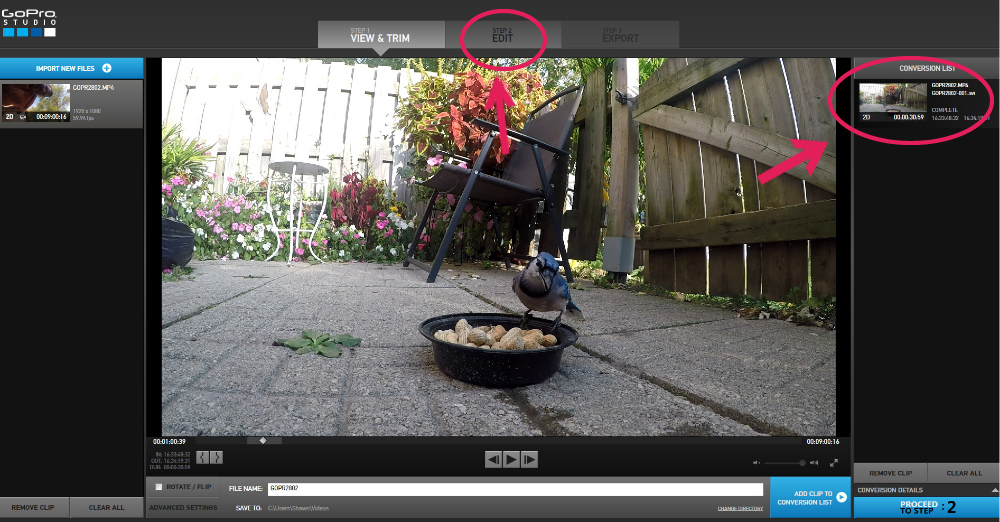
Step 5 – Enhance Your Video: To enhance your video file we can now bring this new clip into the GoPro Studio editor. We do this by clicking the “Step 2 Edit” at the top of GoPro Studio. When prompted open a blank template. You can now drag your clip to the editing timeline and do any enhancements you desire such as color correcting, sharpening, zooming and speed changes.
Step 6 – Export Your Final Video: So with all your video editing done we can now go ahead and export your final video. We do so by click on the “Export” button at the top of GoPro Studio. Set your export resolution parameters and click the export button. Choose a location on your computer were GoPro Studio should export the final video.
Please Note: Technically you now have 3 versions of the video on your computer. The original, the converted file that was created in step 4 and the new enhanced version. You can go ahead and delete the original and the temporary converted file or you may want to save them for archival purposes.
Hopefully, you found these tips and tricks for fixing and removing the fisheye in GoPro videos helpful, leave a comment or contact me if you have any questions about this tutorial.