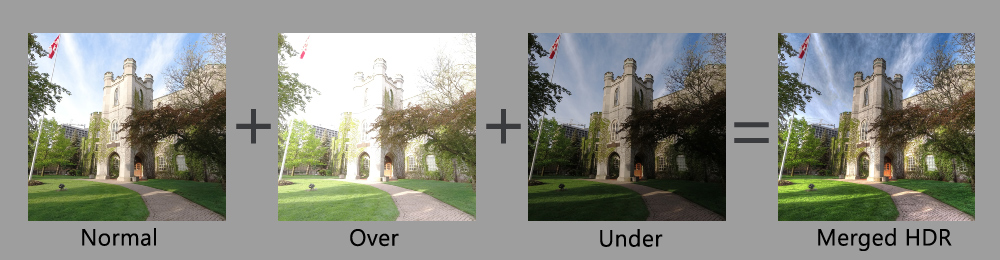
One of the nice new features of the DJI Osmo Action is the ability to easily capture bracketed photos for those who like to create and edit HDR images. Bracketed photos in simple terms are a series of 3 or more photos captured with different exposures. Usually, a bracketed set includes one normally exposed photo, one underexposed photo, and one overexposed photo. All 3 photos are then merged together into one image with HDR editing software such as Aurora HDR 2019 to give you a beautiful photo where there is a lot of detail in both the highlights and lowlight/shadows. The theory behind this is simple. The underexposed photo shows a lot of detail in bright areas such as the sky, you can get some really nice dramatic clouds and the overexposed image captures more detail in dark areas of the image. All cameras have a limited dynamic range as to where it can not expose properly for both bright areas and dark areas so some detail is always lost. With merged HDR bracketed photos you get the best of both worlds.
This can be achieved on a GoPro but it requires quite a bit of work and changing settings every time you capture a photo. This can be an issue as you want almost no movement of the camera when taking bracketed photos. The photos need to line up perfectly when they are merged. Any slight movements can cause ghosting or blurriness. With the DJI Osmo Action, you just set your parameters and press the shutter button and it will automatically fire off a 3 or 5 bracketed photo set.
You can watch our tutorial video on how to create bracketed HDR photos with your DJI Osmo Action.
Aurora HDR 2019: http://bit.ly/2VUVF2a
DJI Osmo Action (DJI Website) http://bit.ly/2W2abJE
DJI Osmo Action (Amazon) https://amzn.to/2EurZTr


