One of the brilliant new features of the GoPro Hero 5 Black is the ability to log GPS telemetry data within videos which can then be displayed over your videos in a visual form of various gauges. Some of the data you can overlay are speed, distance, g-force, altitude, elevation gain and time. All the gauges and data are customizable and can be resized or moved to different parts of the video. This is a great tool for skiing, dirt bike riding, mountain biking or just a nice drive with your car or motorcycle. This will even work on an airplane, you can track how fast the plane is moving and the distance it traveled. In order to have your GoPro record all the telemetry data, you must enable GPS in the preferences menu.
Tutorial: How To Add GPS Data To Your GoPro Videos Using GoPro Quik
Step 1: Power on your GoPro and make sure you have enabled GPS in the preference menu. Wait until the GPS notification is lit up, this confirms that the GoPro has picked up a satellite. Once you confirm your GPS is connected you can proceed with recording your activity as normal.
Step 2: Once you have recorded your video we now need to transfer your video to your computer. It is best if you use the GoPro Quik desktop app to transfer, we will be using this software anyways to add the telemetry data to your video.
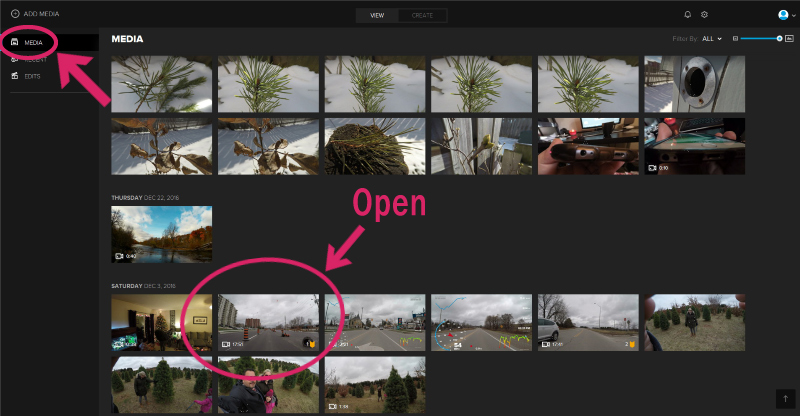
Step 3: Now that your video is transferred to the computer, it’s now time to launch GoPro Quik if you have not already done so. At this point, you should locate your video in the media section of Quik. Once you have found the video you shot with GPS enabled, double-click it to open up the video for editing.
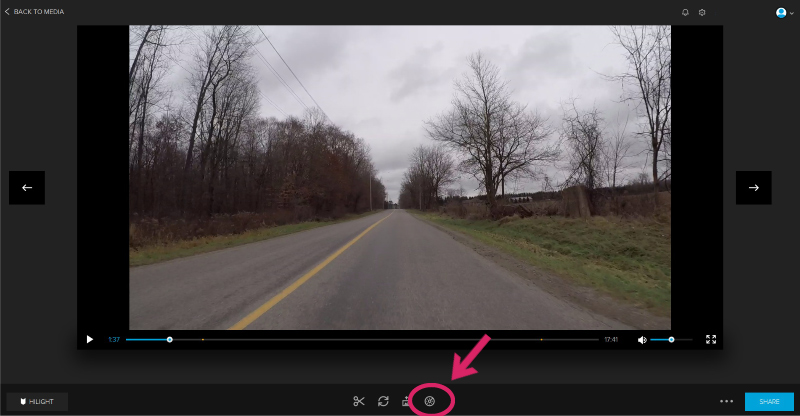
Step 4: Once your video has been selected we are now going to enable the GPS data overlay. At the bottom of the screen click on the icon that looks like a speedometer gauge. This will launch the GPS telemetry data options panel.
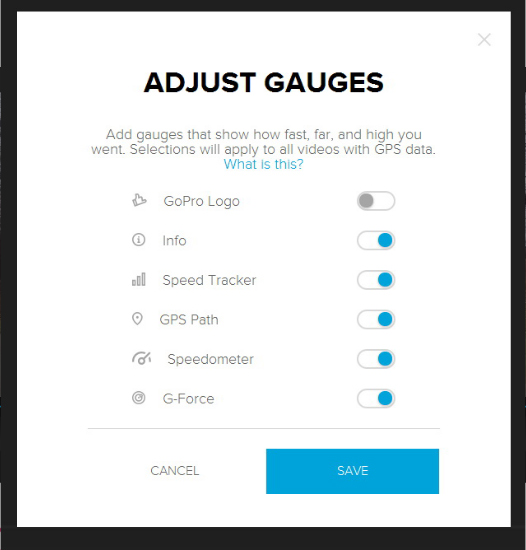
Step 5: The telemetry data options will pop up and here we can enable the specific gauges that we wish. You can select them all or just a few. Slide the toggles to the “on” position and when done click the save button.
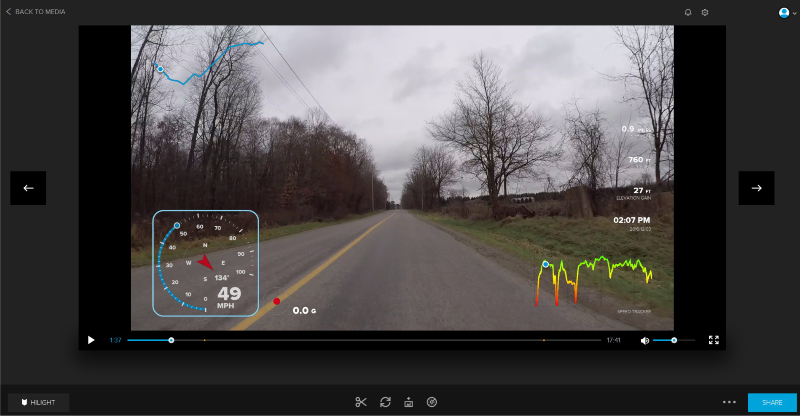
Step 6: After clicking save you will be directed back to your video and you will notice all the new data gauges in your video. Every gauge can be customized you can move them to different parts of the screen. They can also be resized if you so wish.
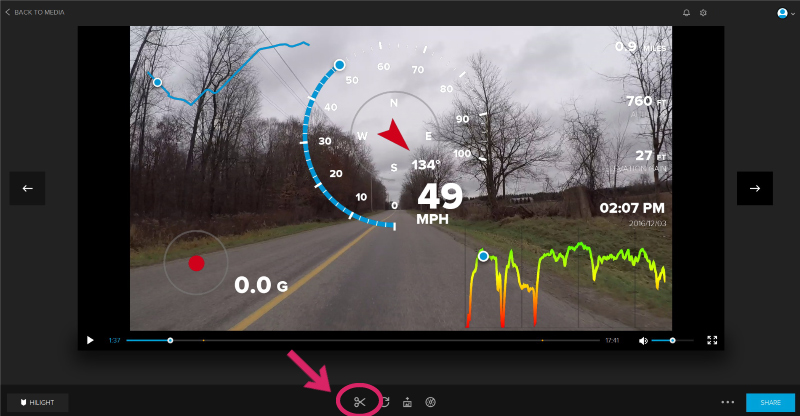
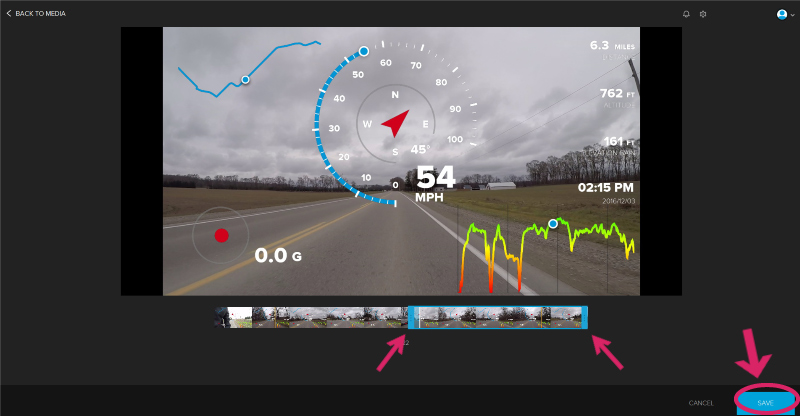
Step 7: To save the video with the GPS data gauges you will now have to click on the scissor icon at the bottom. This will take us to a section where we can trim the clip and save it to our computer.
Step 8: Adjust the scrub bar handles to set the start point and end point of our GoPro GPS enabled video. When done click on the save button and the new GPS clip will be saved to your computer in the same location as the original video. The original video will not be modified, this creates a new clip with the GPS telemetry data.
Tip: You can change from imperial to metric in the settings of the Quik App.
That is it, your GoPro Hero 5 Black videos now have GPS data gauges on them. I hope you found this tutorial on how to add GPS information to your GoPro videos helpful.